
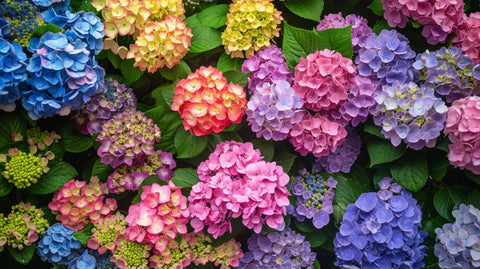
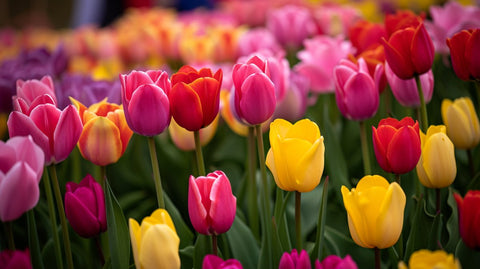
Blog Post - Planting Hydrangeas in Spring

Having a beautiful garden is a dream for many homeowners and gardening enthusiasts. One popular and stunning addition to any garden is the hydrangea. With their large and vibrant blossoms, hydrangeas add a touch of elegance and charm to any outdoor space. If you're thinking about planting hydrangeas, spring is the perfect time to do so. In this comprehensive guide, we will walk you through the process of planting hydrangeas in spring, from choosing the right variety to caring for your plants.
Before you dig into the ground, it's essential to choose the right hydrangea for your garden. There are several varieties of hydrangeas available, each with its unique characteristics and requirements. Consider the following factors when selecting the right hydrangea for your garden:

-
Climate and hardiness zone: Hydrangeas thrive in different climates, so it's crucial to choose a variety that is suitable for your region's hardiness zone. Consult a hardiness zone map to determine which hydrangea varieties are best suited for your area.
-
Soil conditions and pH levels: Hydrangeas prefer well-draining soil rich in organic matter. Test your soil's pH levels to ensure they fall within the hydrangea's preferred range. Some hydrangea varieties change color depending on the soil's pH, so consider this when selecting a variety.
-
Desired color and bloom type: Hydrangeas come in various colors, including pink, blue, white, and even multicolored blooms. Additionally, some varieties have mophead blooms, while others have lacecap blooms. Choose a variety that matches your color preferences and desired bloom type.
-
Space and size considerations: Different hydrangea varieties have varying growth habits and sizes. Consider the available space in your garden and choose a hydrangea that will fit well without overcrowding other plants.
Preparing the Soil and Location: Setting the Stage for Healthy Growth

To ensure your hydrangeas thrive, it's essential to prepare the soil and choose an ideal location for planting. Follow these steps to create an optimal growing environment for your hydrangeas:
-
Well-draining soil: Hydrangeas require soil that drains well to prevent root rot. Test your soil's drainage by digging a small hole and filling it with water. If the water drains within a few hours, your soil is well-draining. If not, you may need to amend the soil with organic matter such as compost or peat moss to improve drainage.
-
Ideal location: Hydrangeas need a balance of sunlight and shade to thrive. Look for a location in your garden that provides adequate sunlight in the morning and some shade in the afternoon. Additionally, protect your hydrangeas from strong winds, as they can damage the delicate blooms. Ensure there is enough clearance between your hydrangeas and other plants to allow good air circulation.
Planting Process: Getting Your Hydrangeas Settled

Now that you have chosen the perfect hydrangea and prepared the soil and location, it's time to plant your hydrangeas. Follow these step-by-step instructions for successful planting:
-
Digging the planting hole: Dig a hole that is twice the width of the hydrangea's root ball and slightly shallower than its height. This will provide enough space for the roots to spread out.
-
Adding compost and organic matter: Before placing the hydrangea in the hole, mix some compost or organic matter into the soil to improve its fertility. This will provide the plant with essential nutrients.
-
Transferring the hydrangea to the hole and backfilling: Gently remove the hydrangea from its container and place it in the hole. Backfill the hole with the amended soil, ensuring that the top of the root ball is level with the surrounding ground.
-
Watering thoroughly after planting: After planting, water the hydrangea thoroughly to settle the soil and eliminate any air pockets around the roots. Water deeply but avoid overwatering, as this can lead to root rot.
Container-grown hydrangeas have the added benefit of being easier to transplant, as their root systems are more established. Simply follow the same planting process outlined above, but be sure to loosen the roots slightly before placing the hydrangea in the hole.
Proper Care and Maintenance: Nurturing Your Hydrangeas

Once your hydrangeas are in the ground, it's important to provide them with proper care and maintenance to promote healthy growth and abundant blooms. Follow these tips to ensure your hydrangeas flourish:
A. Regular watering and proper irrigation techniques: Hydrangeas require consistent moisture to thrive. Water your plants deeply once or twice a week, allowing the soil to dry slightly between watering. Avoid overwatering, as this can lead to root rot.
B. Mulching for moisture retention: Mulching around your hydrangeas can help retain moisture and suppress weed growth. Apply a layer of organic mulch, such as wood chips or shredded bark, around the base of the plant, taking care not to pile it against the stems.
C. Fertilizing for optimal growth and blooming: Feed your hydrangeas with a slow-release, balanced fertilizer in early spring and again in mid-summer. This will provide them with the necessary nutrients for healthy growth and vibrant blooms.
D. Pruning techniques and timing: Pruning hydrangeas can help maintain their shape and promote new growth. Different hydrangea varieties require specific pruning techniques and timing. Consult a gardening guide or seek advice from a local horticulturist to determine the best pruning practices for your particular hydrangea variety.
Dealing with Common Issues: Keeping Your Hydrangeas Healthy
Hydrangeas, like any other plant, can face various pest and disease problems. It's essential to be able to identify and address these issues to keep your hydrangeas healthy. Here are some common problems and their management:
-
Pests: Hydrangeas can attract pests such as aphids and mites. Look out for signs of infestation, such as distorted leaves or webbing. Treat infested plants with insecticidal soap or horticultural oil, following the manufacturer's instructions.
-
Diseases: Hydrangeas are susceptible to diseases like powdery mildew and root rot. Monitor your plants for signs of disease, such as white powdery spots on the leaves or wilting foliage. Manage these diseases by ensuring good air circulation, avoiding overwatering, and using fungicides if necessary.
Improper lighting, soil conditions, and over/under-watering can also affect the health and vitality of your hydrangeas. It's essential to provide them with the right conditions to ensure their long-term success.
Conclusion: Planting Hydrangeas in Spring for an Enchanting Garden
In summary, planting hydrangeas in spring can be a rewarding endeavor that adds beauty and elegance to your garden. By choosing the right hydrangea variety, preparing the soil and location, following the proper planting process, and providing proper care and maintenance, you can enjoy stunning hydrangea blooms throughout the season. Remember to address common issues promptly and seek professional advice if needed. Now it's time to get your hands dirty and bring the magic of hydrangeas to your garden!
For further resources or assistance, check out the following links:


Comments (0)
There are no comments for this article. Be the first one to leave a message!